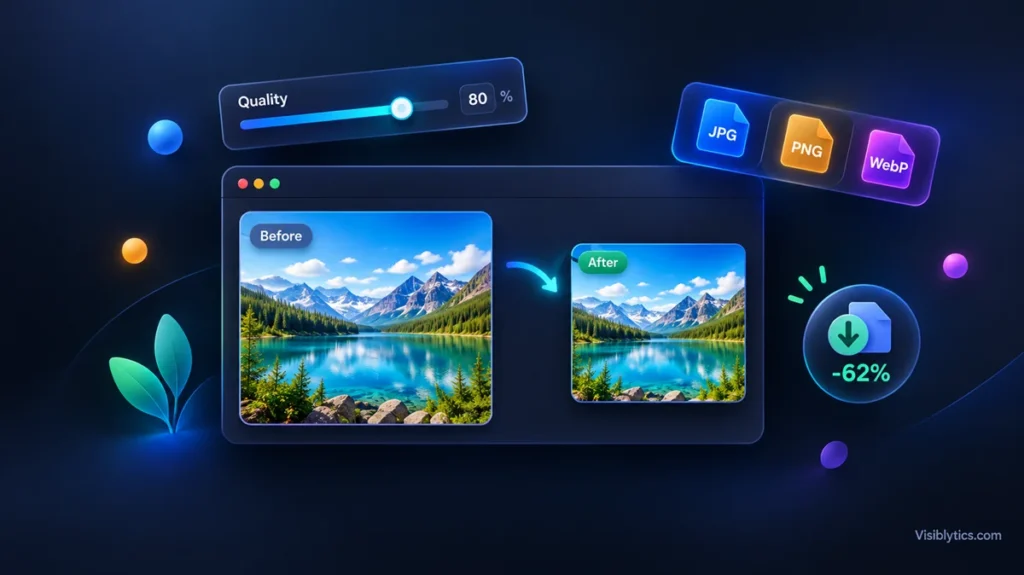
You can compress images without losing quality that anyone would notice. Done properly, most photos shrink by half or more and still look identical on a normal screen. The method comes down to three things: a sensible quality setting, the right file format and the right dimensions.
In my SEO work, oversized images are one of the most common reasons a page feels slow. They also cause upload errors, bounced emails and bloated storage. The fix is rarely complicated. This guide covers the process I follow, the settings I start with and how I check the result.
The short version:
- Keep the original file untouched.
- Resize the image to the size it will actually be displayed at.
- Compress JPG or WebP files at a quality of 75 to 85.
- Compare the result at 100% zoom before you use it.
Can You Really Compress Images Without Losing Quality?
Yes, as long as you define quality as what the eye can see. True lossless compression keeps every pixel but saves only a little. Lossy compression saves far more by discarding detail that most people cannot spot. When someone asks how to compress images without losing quality, they almost always mean without visible loss.
Three things control file size: the quality setting, the dimensions and the format. Dimensions usually have the biggest effect, which surprises people. A photo straight from a phone can be 4000 pixels wide, yet most blog layouts display it at under 1000. Those extra pixels cost bytes and add nothing you can see. Fixing the dimensions first means you can use a gentler quality setting later.
As a rough example, a 4 MB phone photo often ends up between 300 and 700 KB after resizing and compression. I can’t spot a difference at normal viewing size. Results vary with the image, especially with detailed textures like foliage.
Lossy vs Lossless Compression: Which One Should You Use?
Use lossy compression at a high quality setting for photographs, and lossless for logos, screenshots and graphics with text. Lossy compression removes data permanently, but at quality 75 to 85 the loss is usually invisible. Lossless compression rebuilds the exact original, so it suits images where sharp edges matter.
| Lossless | Lossy | |
|---|---|---|
| What happens | Redundant data is removed, every pixel is kept | Fine detail is discarded permanently |
| Typical savings | Modest | Large |
| Best for | Logos, screenshots, icons, text graphics | Photos, banners, product images |
| Common formats | PNG, lossless WebP | JPG, lossy WebP |
The catch with lossy is that it stacks. Every time you re-save a JPG, more detail is thrown away. If you want to compress images without losing quality on a photo, always start from the original file, never from a copy that was already compressed.
How to Compress Images Without Losing Quality Using a Free Online Tool
The fastest way is a browser-based image compressor: upload the file, pick a quality level, check the preview and download. It takes about a minute and needs no software. Here is the process I use with the free image compressor on Visiblytics. The same logic applies to most tools.
- Save a copy of the original. Compression is a one-way trip, so keep the master file safe.
- Resize if needed. If the image is far larger than its display size, fix that first. I explain this in the resize section below.
- Add your file to the image compressor. Drag and drop it or browse from your device.
- Set the quality. Start around 80 for JPG or WebP. If the tool offers an automatic or target-size mode, use it as a starting point, then check the result yourself.
- Compare before and after at 100% zoom. If you see blockiness, raise the quality by five or ten points and run it again.
- Download and rename. Add a suffix like “-compressed” so you never overwrite the original.
One note on privacy. Some online tools upload your files to a server, while others process images inside your browser. If the image is sensitive, check which approach the tool uses before you upload.
Best Compression Settings for JPG, PNG and WebP
For JPG and WebP, start at quality 80 and adjust in steps of five. For PNG, use lossless optimization, or convert the file to WebP if you want a much smaller size. These are starting points, not laws, because the right setting depends on the image.
| Format | Best for | Starting setting | Watch out for |
|---|---|---|---|
| JPG | Photos | Quality 75 to 85 | Blocky artifacts around text and sharp edges |
| PNG | Logos, screenshots, transparency | Lossless optimization | Very large files when used for photos |
| WebP | Almost everything on the web | Quality 75 to 80 | Very old software may not open it |
WebP is typically 25 to 35 percent smaller than JPG at similar visual quality, and it supports transparency. All major browsers can display it. That is why I convert to WebP whenever the platform accepts it.
How to Check That Your Image Did Not Lose Quality
Open the original and the compressed version side by side at 100% zoom and look at three areas: smooth gradients, sharp edges and fine textures. If all three look the same, the compression is safe. If any of them looks blocky, blurry or banded, raise the quality setting.
Gradients, such as a clear sky, show banding first. Text and sharp edges show fuzzy halos. Skin and foliage show smoothing, where fine detail turns into a soft blur.
I also look at how much each step saves. Dropping from quality 100 to 85 usually saves a lot. Dropping from 85 to 75 saves less and risks more. That diminishing return is why I rarely go below 75 for photos. Compressing images without losing quality only holds true if you verify it with your own eyes.
Common Mistakes That Cause Visible Quality Loss
Most quality problems come from workflow errors, not from compression itself. The usual causes are compressing a file that was already compressed, choosing the wrong format and pushing the quality slider too low.
- Re-compressing the same JPG. Each save discards more data. Always work from the original.
- Using JPG for screenshots and text. You get fuzzy halos around letters. PNG or lossless WebP handles these better.
- Enlarging a small image after compressing it. Compression cannot add detail back. Get the size right first.
- Forcing the quality too low to hit a size target. If the file is still too big, reduce the dimensions instead.
- Ignoring display size. A 5000 pixel image in a 600 pixel slot wastes bandwidth for no visible gain.
Compress, Resize or Convert: Which One Do You Need?
Compress when the dimensions are right but the file is heavy. Resize when the image has more pixels than the page will ever show. Convert when the format is wrong for the content, such as a photo saved as a PNG. Often you need two of the three.
If a photo is 5000 pixels wide and will display at 800, run it through an [image resizer]([ADD URL]) first and compress afterwards. If you have a PNG with a transparent background on a website, a [PNG to WebP converter]([ADD URL]) can cut the size sharply and keep the transparency. The order I follow is resize, convert, then compress. It is the simplest way to reduce image size without losing quality.
How Small Should Your Images Be?
For most websites, aim for blog images under 150 KB and hero banners under 250 KB. These are my working targets, not official limits, and they assume the image is already sized correctly. Smaller is only better while the image still looks clean.
| Use | Target size |
|---|---|
| Blog inline image | 60 to 150 KB |
| Hero or banner | 150 to 250 KB |
| Product photo | 80 to 200 KB |
| Thumbnail | 15 to 40 KB |
| Email attachment | Under 1 MB, or the sender’s limit |
Upload forms often have their own limits, so check the exact number before you start.
❓ Frequently Asked Questions
Does compressing an image reduce quality?
Lossy compression removes some data, so technically yes. At a sensible setting the loss is not visible at normal size. Lossless compression does not change any pixels.
What is the best quality setting for JPG?
80 is a solid starting point, and 75 to 85 covers most photos. Go higher for detailed images with fine text. Go lower for small thumbnails.
Is it safe to use a free online image compressor?
It is generally fine for ordinary images, but check how the tool handles your files. Some process images in your browser and others upload them to a server. For private or client images, read the tool’s privacy details first.
Which is smaller, JPG, PNG or WebP?
For photos, WebP is usually smallest, then JPG, then PNG. For flat-color graphics, PNG or lossless WebP can be very compact. The result depends on the image content.
How do I compress an image to a specific size in KB?
Lower the quality in steps of five and reduce the dimensions if needed, checking the file size each time. If the tool has a target size option, use it, then confirm the result visually.
Final Thoughts
To compress images without losing quality, resize first, choose the right format, compress at about quality 80 and check the result at full size. That routine works for almost every website, email and upload form. Keep your originals, and treat the numbers here as starting points to test rather than fixed rules.